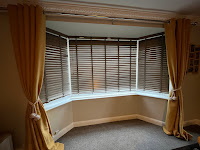
Preparing the Bay Window for Shutters
After a surprising message saying that my shutters were going to be delivered and fitted within the space of a week, I very quickly had to be able to take my blinds down in the lounge. I am not really a DIY type girl, despite what I make it sound like on this blog. Not only am I not very good at it, I also hate doing it. Sadly, although I tried my absolute hardest to try and get someone over to help me take down my blinds, it was to absolutely no avail and I was at a loss.
After taking down the blinds, it caused a lot more damage than I anticipated. The paint mismatch was very obvious from where the blinds had been during the redecorating. The screws for the brackets were very deeply secured, with one taking down a finger width of plaster with it and leaving the biggest hole. I then put 2 layers of filler in, letting it dry 24 hours in between, before painting both the bay itself and the wall either side that had literal blind marks in.
Finally, the last job was to paint. I was hoping to be able to refill to make it a little smoother and then sand it down, but I thought a quick coat of paint was better than nothing. From a distance it looks great; up close it's a little uneven and needs another coat, with probably a sand down too. Nevertheless, I didn't have time before the fitter came so here's the official during photo. Stay tuned for the final reveal!


Comments
Post a Comment